Category: rtl-sdr
Setting up RTL-SDR on Raspberry Pi 3
This post presents the RTL-SDR setup on Raspberry Pi 3 with Raspbian

Setting up the environment
Open the terminal, then:
pi@raspberrypi:~ $ sudo apt-get install gnuradio % take some time to install all packages
pi@raspberrypi:~ $ gnuradio-companion % if it opens the gnuradio-companion, everything is ok
Installing RTL-SDR and gr-osmosdr packages
pi@raspberrypi:~ $ sudo apt-get install rtl-sdr gr-osmosdr
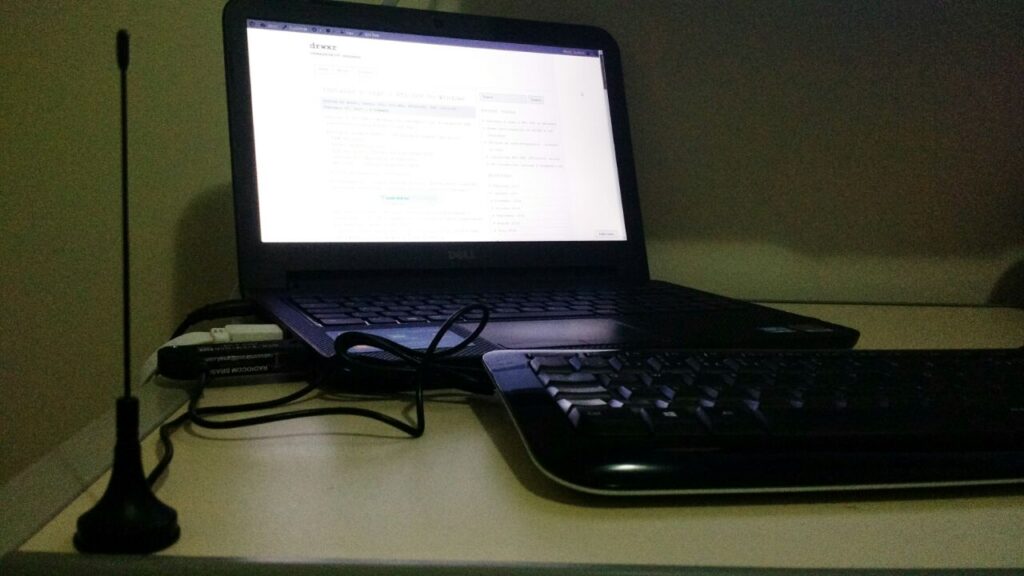
After successfully installing the packages, plug the RTL-SDR to the Raspberry Pi 3 USB Port, then list the USB devices connected to the Raspberry Pi 3:
pi@raspberrypi:~ $ lsusb
Look for Realtek device (RTL), in my case “Realtek Semiconductor Corp. RTL2838 DVB-T”:

Now it is time to check if RTL-SDR is working:

In my case it is working by the first time on Raspberry Pi 3, but there is a known issue (on Ubuntu) related to driver conflict (it uses the Digital TV Driver – dvb_usb_rtl28xxu), if this is your case, do the following:
pi@raspberrypi:~ $ sudo rmmod dvb_usb_rtl28xxu % to make this fix permanent, you have to move driver dvb_usb_rtl28xxu to blacklist
and, try again:
pi@raspberrypi:~ $ rtl_test
Testing time 🙂
Install the GQRX, through apt-get:
pi@raspberrypi:~ $ sudo apt-get install gqrx-sdr
Then run GQRX:
pi@raspberrypi:~ $ gqrx
If not asked to select I/O Device, go to “File” > “I/O Devices” then select Realtek RTL-SDR, now you can click “Power” button then you can hear noise and see FFT live graph (up) and waterfall live graph (bottom).
Pay attention:
Due to processing limitations from Raspberry Pi, to avoid crashes, you have to reduce the sample rate for GQRX, to do it go to: “File” > “I/O Devices” > “Sample Rate” or edit /home/pi/.config/gqrx/default.conf
RTL-SDR known to works up to 2.4 Msps on Raspberry Pi 3 and up to 1.44 Msps on Raspberry Pi 2.
In most cases you can reduce the CPU load further by reducing the window size, sample rate, FFT rate and FFT size (try 2048 at 10-15 Hz). If you are only interested in the FFT, set Mode to “Demod Off”. This will greatly reduce the CPU load.

Another option due to GQRX limitation on Raspberry Pi, you could try QTCSDR on GitHub that also allows TX through GPIO 18 (rpitx), but now just to check RX function:
- git clone https://github.com/ha7ilm/qtcsdr
- cd qtcsdr
- ./rpi-install.sh
- ./rpi-test.sh
If rpi-test.sh succeeds, then type qtcsdr on command line.
pi@raspberrypi:~ $ qtcsdr

Congratulations, your RTL-SDR is working on Raspberry Pi 3! Now you can use available SDR tools on Raspberry Pi 3.
Instalar e usar o RTL-SDR no Windows
Para uso do RTL-SDR no Windows, recomendamos o uso de um pacote SDR disponibilizado pela Airspy (clique aqui)
Neste post estamos usando o “SDR Software Package” que inclui:
– SDR# rev 1500
– Airspy Calibration Tool
– ADSB Spy rev 37 (Decodificador de sinais ADSB)
– Spectrum Spy (Analisador de Espectro)
– Astro.Spy – Utilitário para astronomia
Se desejar, baixe aqui: sdrsharp-x86
Ao descompactar o arquivo sdrsharp-x86.zip, deve-se estar conectado na internet e executar o seguinte arquivo (install-rtlsdr.bat):

Este arquivo irá se conectar ao servidor da OSMOCOM e baixar o driver para o RTL-SDR e também fará o download do Zadig, responsável por instalar o driver do RTL-SDR.
* Neste instante, plugue seu dongle do RTL-SDR e não instale nada que o Windows venha a propor de forma automática.
Na pasta criada a partir do sdrsharp-x86.zip, execute o arquivo zadig.exe como administrador:

Dentro do Zadig, selecione no menu Options > List All Devices de forma a deixar a opção selecionada:

Conforme exemplo acima, ele já encontrou 6 dispositivos (vide barra inferior).
* Neste caso, o Zadig já encontrou o driver referente ao RTL-SDR, na figura abaixo como “RTL2838UHIDIR”, no entanto, conforme Quick Start Guide usado de referência, pode ser o caso que o driver não faça referência direta ao RTL e pode aparecer algo como “Bulk-In, Interface (Interface 0)”.
Garanta que a seta esteja apontando para WinUSB e clique em “Replace Driver”


Em seguida podemos verificar (na pasta criada a partir do sdrsharp-x86.zip) os seguintes aplicativos já mencionados:

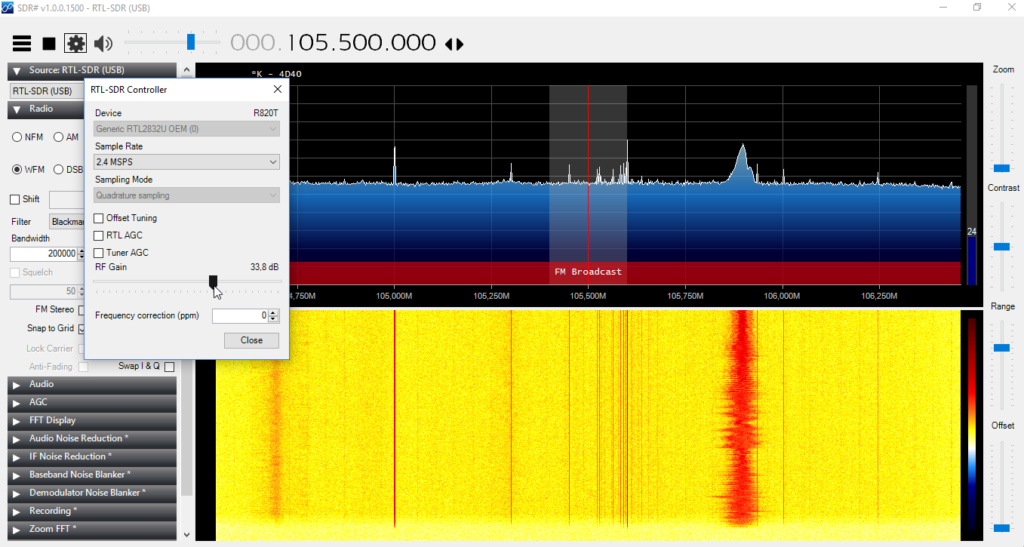
Execute o SDRSharp.exe e já defina como “Source” o RTL-SDR (USB):

Em seguida clique em “Play” e o SDR# já irá iniciar a captura:

* Importante! Lembrar de ajustar o ganho RF. Um ganho de “zero” só irá captar sinais muito forte por isso é necessário ajustar o ganho até aparecer o sinal desejado (no exemplo acima nenhum sinal está sendo captado). Para ajustar o ganho, clique em configurações e em seguida ajuste o “RF Gain”:

A partir de agora, seu RTL-SDR está configurado no Windows! Agora é procurar projetos para praticar e começar a fuçar com o RTL-SDR.
Qualquer dúvida, use o espaço de perguntas ou entre em contato.
* Post elaborado usando o Windows 10
Installing RTL-SDR (RTL2832U) driver
This content is a piece of our initiative to explain how to start your studies with RTL-SDR.
In this post we’ll explain about how to install the rtl-sdr driver.
To install the RTL-SDR device on a Linux computer is relatively quick and easy.
These instructions are designed to run on Linux distributions based on Debian or Ubuntu.
Installing the drivers:
1. Open the terminal and make sure you are in the home directory.
2. Update your Linux distribution:
sudo apt-get update
3. Install the necessary tools such as: git, cmake, build-essential
sudo apt-get install git
sudo apt-get install cmake
sudo apt-get install build-essential
4. Install the library called “libusb-1.0-0-dev” which provides access to USB devices.
sudo apt-get install libusb-1.0-0-dev
5. Download and install the RTL2832U from vendor site:
git clone git://git.osmocom.org/rtl-sdr.git
cd rtl-sdr/
mkdir build
cd build
cmake ../ -DINSTALL_UDEV_RULES=ON
make
sudo make install
sudo ldconfig
sudo cp ../rtl-sdr.rules /etc/udev/rules.d/
6. Create a “blacklist” to the default driver which loads automatically using the RTL-SDR device as a TV receiver, because this isn’t the functionality we want to use (tv receiver).
A. Access as administrator the directory: /etc/modprobe.d
B. Create a new file called “blacklist-rtl.conf” and add the following line in the file:
blacklist dvb_usb_rtl28xxu
blacklist rtl2832
blacklist rtl2830
C. Save the file and reboot the machine.
7. After reboot the machine, test if the device is actually running. To test type the follow command in the terminal:
rtl_test -t
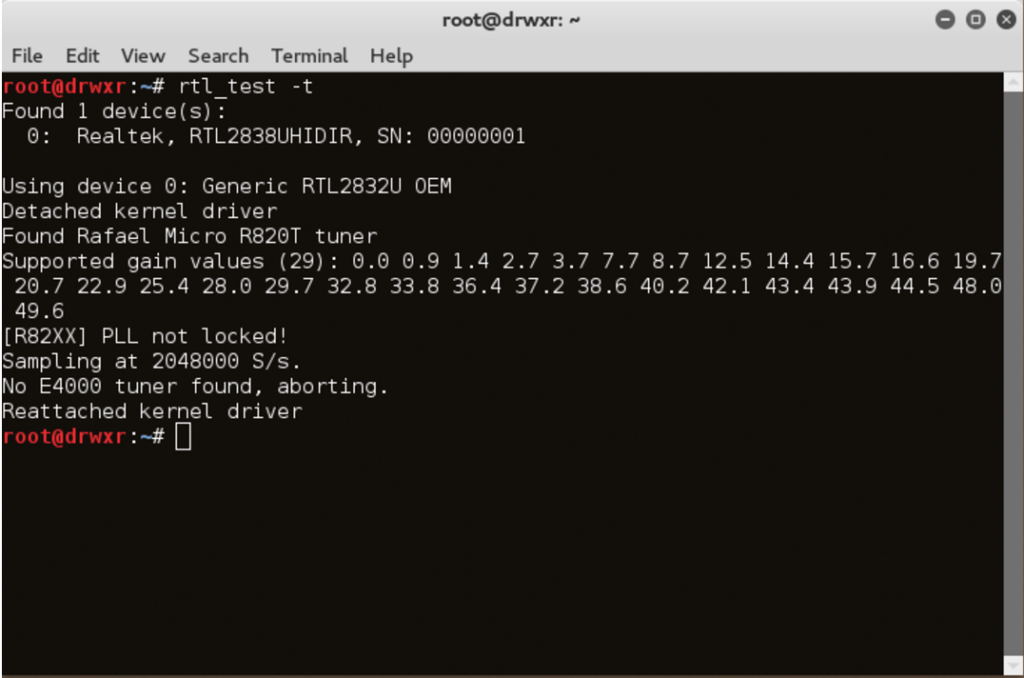
Don’t worry with the follow messages:
“PLL not locked”
“No E4000 tuner found, aborting”.
If you see these messages above it is a sign that your driver and your device is working properly and you are ready to install some applications like GQRX, Dump1090, CubicSDR and others…